Potato and Cheese Tart

229 days. That’s how long it’s been since I’ve sat down and tried to write anything here. Is it laziness? Writer’s block? A lack of interest? I suppose it could be all of the above. Hmm. 

Anyway… I was scrolling through my food pictures from 2019 when I stumbled on the pictures of this blue cheese potato tart, and I thought, “if there’s a recipe worth putting on the blog, it’s this one.”

I mean, this one ticks all of my food boxes: bread / pastry, potatoes, and cheese. If I could live on this combination AND still fit into my pants, I’d eat it 3-4 days a week. (My choice for the rest of the week? Tacos.) 

I’d originally planned to make the Parmesan / potato tart from the same issue of Cook’s Country, but I was running low on parm, so I went with the blue cheese version instead. I have zero regrets about that choice.

The tart takes a little while to bake, but that means you can have the dishes done (and a salad made, if you’re interested in balanced meals) by the time it comes out of the oven. It will smell incredible, and, if you’re anything like us, you’ll cheat the 20 minute cooling time by at least 10 minutes.

potatobluecheesetart

Blue Cheese and Potato Tart

For the tart dough: 
7-1/2 ounces all-purpose flour
1/2 teaspoon table salt
10 tablespoons unsalted butter, cut into 1/2″ pieces and chilled
6-7 tablespoons ice water

For the filling: 
4 ounces cream cheese
2 ounces blue cheese, crumbled, divided
1 ounce Parmesan cheese, grated, divided
2 tablespoons extra-virgin olive oil
2 teaspoons Dijon mustard
1-1/2 teaspoons minced fresh rosemary, divided (I was out of fresh and subbed dried with no issues.) 
1/4  teaspoon pepper
1/2 teaspoon salt
1 large egg, separated
1 pound russet potatoes, peeled and sliced 1/8″ thick
1 shallot, thinly sliced

First, prepare the tart dough. Process the flour and and salt in the bowl of a food processor until combined, just a few seconds. Scatter the butter on the flour mixture and pulse until the mixture resembles coarse crumbs, about 10 pulses or so. Add 6 tablespoons of ice water and process until almost no dry flour remains, about 10 seconds. Scrape down the sides of the bowl. Add the remaining tablespoon of water if the dough won’t come together.

Scrape the dough out onto a lightly floured counter and shape it into a 4″ square. Wrap the dough in plastic wrap and chill it in the fridge for an hour. (If you’re a planner, this step can be done ahead of time – the dough can hang out in the fridge for up to 2 days.) 

When you’re ready to make the tart, remove the dough from the fridge and preheat the oven to 375°. Line a baking sheet with parchment paper (or a silicone baking sheet). Let the chilled dough soften on the counter for about 10 minutes, then roll the dough into a 14″ x 11″ rectangle on a lightly floured counter. Transfer the dough rectangle to the prepared baking sheet.

In a large bowl, microwave the cream cheese until it’s softened, about 20 to 30 seconds. Whisk in 1/4 cup of blue cheese, 1/4 cup Parmesan cheese, olive oil, mustard, 1 teaspoon rosemary, pepper, and salt. Add the egg yolk and whisk until combined. Add the potatoes and shallot to the cheese mixture and stir until the potatoes are thoroughly covered.

Pile the filling in the center of the dough. Spread it an even layer, leaving a 2″ border on all sides. Sprinkle the rest of the blue cheese, 2 tablespoons of Parmesan cheese, and the rest of the rosemary over the filling.

Fold one long side of the dough about 1-1/2″ over the filling. Do the same thing on the other long side of the tart. Fold in the short sides of the dough and overlap the corners to secure the dough. Lightly beat the egg white and brush it all over the folded crust. Sprinkle the rest of the Parmesan cheese all over the crust.

Bake until the crust and filling are golden brown and the potatoes test done when poked with a fork, about 45 minutes. Transfer the baking sheet to a wire rack, and let the tart cool for about 10 minutes. Use a metal spatula to loosen the tart from the parchment paper and slide it onto the wire rack. Let tart cool until warm, then slice and serve.

from Cook’s Country, December / January 2020 

Looking for a printable version?

Everyday French Toast

It’s no secret that I’m not always a morning person. While I love some things about mornings (peaceful bike rides and sunrises), I really only like them on my terms… aka not when the alarm goes off at 5:30.

It should go without saying then, that I don’t actually make breakfast for breakfast all that often – especially on a work day. (Sorry, Andy.) Holiday weekends, however, are the perfect time to actually make breakfast – as long as they don’t require getting out of bed before I’m ready to start the day.

Enter this new method for making French toast from Cook’s Illustrated. You bake an entire cookie sheet of toast in the oven, which means you get:

a). Crispy, golden brown slices without underdone middles (mushy French toast is the worst).
b). No flipping / turning during the cooking process = no babysitting the pan, so you can wash the dishes, set the table, slice fruit, or do whatever else you’d like to do while breakfast is cooking.
c). All the slices are done at the same time, so everyone eats at the same time!

Seriously. It’s been a game-changer over here. And it doesn’t require any fancy bread, so odds are pretty good that you can make this on any morning (or evening) that you want. Win-win-win.

EverydayFrenchToast

Everyday French Toast

vegetable oil spray (I used olive oil spray, since that’s what’s in my pantry.)
3 eggs
2 teaspoons packed brown sugar
1 tablespoon vanilla
1/2 teaspoon cinnamon
1/4 teaspoon table salt
2 tablespoons unsalted butter, melted
1 cup milk
8 slices of hearty white sandwich bread (I’ve used regular sandwich bread from Aldi with no problems!) 

Arrange one oven rack in the lowest position in the oven, and place the other oven rack about 6″ from the broiler element. Preheat the oven to 425°.

Spray a large (18″ x 13″ is the recommended size from CI, but mine is slightly smaller and it works out OK) rimmed baking sheet with non-stick spray.

In a large glass measuring cup, whisk the eggs, sugar, vanilla, cinnamon, and salt together until the sugar has dissolved. Pour in the melted butter, whisking constantly, then whisk in the milk.

Pour the egg mixture onto the prepared baking sheet. Place each slice of bread on the sheet, making two rows of four slices. Leave a small space in between each slice of bread. When you’ve placed the last piece of bread on the sheet, flip each slice of bread over, starting with the first piece of bread that you placed on the sheet. Once all of the bread has been flipped, let the slices sit on the sheet until the bread soaks up the rest of the egg mixture (about 1 minute or so).

Place the sheet on the lowest rack in the oven and bake until the bottom of the slices are golden brown, about 10-15 minutes. (This takes about 10 minutes in my oven.) Move the sheet to the rack closer to the broiler and broil until the tops of the slices are golden brown, about 1-4 minutes. Watch the toast during this time to make sure it doesn’t burn, and rotate the pan as necessary to ensure even browning.

Remove sheet from oven and use a metal spatula to lift the slices off of the pan. Serve immediately.

From Cooks Illustrated, March / April 2019

Printable version

What We’re Eating 3/11 – 3/15

It’s menu time! Between work trips and meetings, dinner has been rather, uh, spontaneous around here. And while I like to fly by the seat of my pants for 90% of life, a little bit of structure in the kitchen makes me a happier cook. 🙂

Monday 3/11 – Leftovers. Exciting, I know, but I won’t be home until after 7:30, so it’s every man for himself when it comes to dinner.
Tuesday 3/12 – Tortellini soup
Wednesday 3/13 – Roasted shrimp with feta and green beans. It’s been ages since I’ve made this dish, so I’m looking forward to it! (Hopefully it’s as good as I remember.) 
Thursday 3/14 – Shredded beef tacos! (I’m not observing pi day this year… whoops.) But, I might get home late Thursday night, so it’s winner winner, crockpot dinner.
Friday 3/15 – BBQ chicken pizza on my favorite sourdough crust. I just fed Fester this afternoon, so I can mix up the crust later this week.

In other food-related news, I have a hold request at the library for one of the newest books from America’s Test Kitchen, Vegetables Illustrated. I can’t wait to check it out, and I’m sure it’s going to make me want fresh, in-season produce even more! My goal is to check it out before farmer’s market season and see if it’s worth adding to my personal collection!

Finally, Andy and I spent a quick weekend in San Diego last month, and while we failed at my goal of getting tacos, we did enjoy some great beer and food at Legacy Brewing Tap & Kitchen. The peanut butter milk stout was like drinking a peanut butter cup. Too bad I couldn’t figure out a way to get a growler on the plane. 😉

Improving Vanilla Ice Cream

Well… let’s just ignore the nearly eight-month-long, uh, sabbatical, here, okay? I mean, no one likes excuses, and the fact is, I just didn’t make time to write for the last several months.

Instead, let’s just pick up right where we left off. With ice cream.

I made this ice cream last fall for a girls night with a few good friends. Of course, everyone has shortcomings, and, unfortunately for this chocoholic, several of these friends would pick vanilla and caramel over chocolate any day. So, in an attempt to liven up the world’s most boring flavor, I swirled my standard custard-based vanilla ice cream with some caramel sauce and served it with a giant cookie.

Everyone enjoyed it, including me. (After all, I don’t hate caramel or other flavors, but chocolate will always be my first love…) So, maybe that’s a sign that I should start making ice cream (and blogging) more often. The old downside to this plan is the fact that I’m right in the middle of birthday season for some vanilla fans. I’m going to need a chocolate fix pretty soon.

caramelswirlvanillaicecream

I used a homemade caramel sauce (thanks to America’s Test Kitchen), but you could definitely use your favorite, already-prepared caramel sauce. It’d also be good with an extra pinch of sea salt either in the caramel or on top of the ice cream, for that salty-sweet combo that everyone loves.

Caramel Swirl Vanilla Bean Ice Cream 

5 egg yolks
1 cup of half-and-half
3/4 cup of sugar
2 cups heavy whipping cream, divided
pinch of salt
1 vanilla bean, split and scrapped
1-2 teaspoons (give or take) vanilla extract
1/2 cup caramel sauce, plus extra for serving if desired

In a medium saucepan, whisk together the half-and-half, sugar, salt, and one cup of cream. Set the pan over medium heat and add the vanilla bean seeds and pod. Heat, stirring occasionally, until the sugar dissolves and the mixture is warm. Remove from the heat, cover, and let steep for a little while (30 minutes or so).

In a glass 2-cup measuring cup, whisk the egg yolks together until they are smooth. If the milk mixture has cooled, reheat it until it’s warm to the touch again. Slowly pour 1/4 cup of the warm milk into the egg yolks, whisking constantly. Continue to add the warm milk to the egg yolks, 1/4 cup at a time, whisking the entire time. When you’ve added about 1 1/2 cups of warm milk, pour the egg yolk mixture back into the saucepan, whisking the entire time.

Cook the mixture over medium heat, stirring it constantly with a rubber spatula. When the custard has thickened and coats the back of a spoon, remove it from the heat.

Pour the remaining cup of cream into the bottom of a mixing bowl or large measuring cup. Set a fine mesh strainer over the cream and pour the custard mixture through the strainer. Remove the strainer and add the vanilla bean back to the ice cream base. Stir in the vanilla extract.

Chill the ice cream base in the refrigerator until it’s completely cold, at least a few hours or overnight. Churn the ice cream in an ice cream maker according to the manufacturer’s directions. When the ice cream is finished churning, drizzle a couple tablespoons of caramel sauce into the bottom of the container you will store the ice cream in. Scoop about a third of the ice cream on top of the caramel, then drizzle another few tablespoons of caramel sauce on top of the ice cream. Repeat the process until all of the ice cream has been layered in the container with the caramel sauce. Drizzle a little more caramel sauce on top of the ice cream, then freeze until solid.

Serve with extra caramel sauce, if desired.

Ice cream base adapted from my Moose Tracks ice cream recipe, which is initially from David Lebovitz via Everyday Annie.

Click here for a printable version.

Farmer’s Market Finds, Week 2

Happy almost-July, everyone! It’s a sizzling hot weekend around here, but we got up early to beat the heat (and some of the crowds) for our fresh produce.

We started the day out at Cuff Farms for one last round of strawberry picking. It was the best picking we’ve seen all season, so we each filled a flat and came home with about 27 pounds of berries. The only question is what to bake first! 😉 StrawberryPicking2018

We stopped at the farmer’s market on our way home, and I snagged a lot of tasty veggies. This week, I brought home:

  • 1 bunch of beets
  • 1 bunch of kale
  • 2 heads of broccoli
  • nearly 2 pounds of sugar snap peas
  • 3 zucchini

2018-FarmersMarketFindsWeek2

So, what are my plans for this pile of goodies? I’m super excited to make this pasta dish again, and, if I’m being honest, that’s about as far as I’ve gotten. I might do a stir-fry or some rice bowls with some of the other veggies. Our lettuce is going strong in our garden, so I’m working lots of salads into our menu as well.  The cucumbers in our garden are coming along nicely, so it won’t be long before we’re enjoying some pickles along with all of our meals.

Have a great 4th of July!

Farmer’s Market Finds, Week 1

It’s finally farmer’s market season around here! We stopped by Olden Organic’s stand to pick up our punch card, and I decided to do a little shopping at the same time.

2018-FarmersMarketFindsWeek1

I picked up a head of lettuce, and more than a pound of sugar snap peas. I also learned that we’ll need to get to the stand before 9:30 AM to have a chance at getting asparagus or garlic scapes.

The lettuce is destined for a bunch of salads, and we’ve been snacking on the peas already. More of the peas will end up in a stir-fry later on this week.

Speaking of scapes, they’re just starting to appear on our garlic. Garlic scape pesto, here we come! Strawberry season has started here as well, so we’re planning to go picking sometime soon. Yay for summer produce!

Hello, June!

Oh look at that… I let May go right by without writing ANYTHING. Whoops. I’d like to promise that it won’t happen again, but let’s be honest… we’ve been here before. (Plus, I’d hate to lie to all five of the people still reading this blog. Ha.) 

I might not be writing, but I am still cooking. I’ve acquired a new cookbook (thanks to Karen!), and the more I read it, the more I’m convinced that I could be friends with Bridget and Julia. (That’s not weird, right? I’m just cooking their recipes; not camping out at ATK in Boston.) 😀

Cookbooks

I’m also monopolizing the library’s copy of The Perfect Cake, which is counteracting all of my summer exercise. So far, I’ve tried one of the mug cakes, the chocolate sheet cake,  the icebox Margarita cheesecake, the strawberry dream cake, and the Boston cream pie. I’m hoping to make at least a couple more cakes before I hit the renewal limit in a couple weeks. 🙂

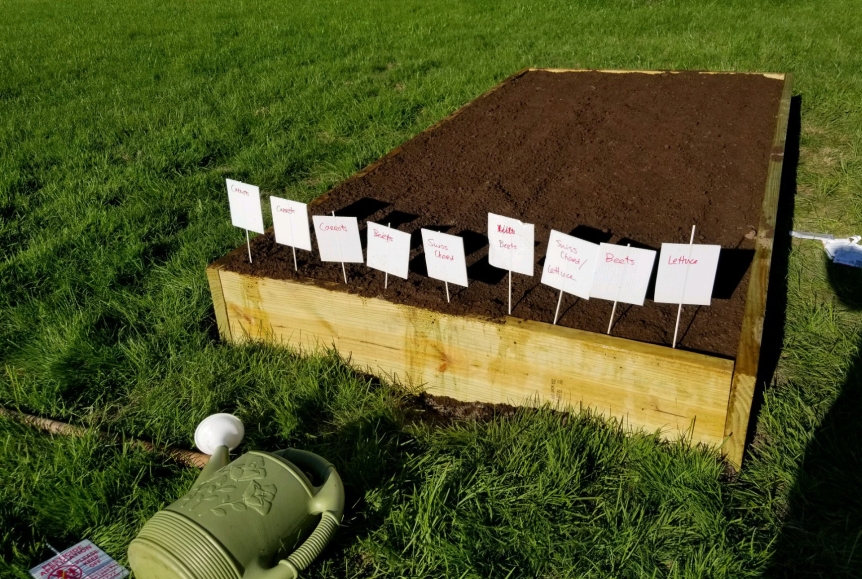
We also planted our garden! We’ve added a raised bed, so things are a little less crowded (in theory… somehow we still ran out of room), and our lettuce just started to poke up through the ground yesterday.  Grow, baby, grow! Our rhubarb is up and thriving, so I’m going to start filling the freezer and make a few desserts along the way.

newgardenbed.jpg

For the first time in five years, we aren’t participating in a CSA. Our CSA farm isn’t offering a CSA share this season, so we’re going to try their market share instead. I have mixed feelings about it, but I am excited for the season to start! (I’ll definitely miss the “grab bag” aspect of a CSA, since it forces me out of my comfort zone, but it will be nice to get to the farmer’s market regularly. And I won’t miss trying to find ways to use the kohlrabi.) 

That pretty much brings us up to the present. I do have an ice cream recipe to share soon, so hopefully June isn’t as quiet here as May was!

Cheesecake: The Dessert of Unity

I’m pretty sure that I mention this every April, but it’s BIRTHDAY MONTH (for another few hours anyway)! And while there are multiple people to celebrate, I only made a few desserts this time around.

We kicked off the April celebrations with dinner at one of our favorite places. We filled up on appetizers (alligator bites and cheese curds), drinks (coffee brown ale and vanilla stout), and dinner (burgers for Andy and me, of course). And while I’m sure Stone Arch serves a decent dessert, there was no way I could have eaten anything else by the time we were done with our meal. Plus, I knew that there was cheesecake waiting for us at home.

I’d been monopolizing the library’s copy of “Just Add Sauce,” and what I really wanted to make was the chocolate-caramel pecan pie from the book. However, it has peanut butter in it, and Arron, for whatever reason doesn’t like peanut butter. Weirdo… And then there’s Josiah, who claims to “not like dessert.” Also a weirdo. However, both of them love cheesecake, so when I saw a cheesecake recipe in the back of Just Add Sauce, I figured I couldn’t go wrong. (My other choice was going to be the New York style cheesecake from Cook’s Illustrated, but it looked like a much bigger project, and I didn’t have time to tackle that one.) 

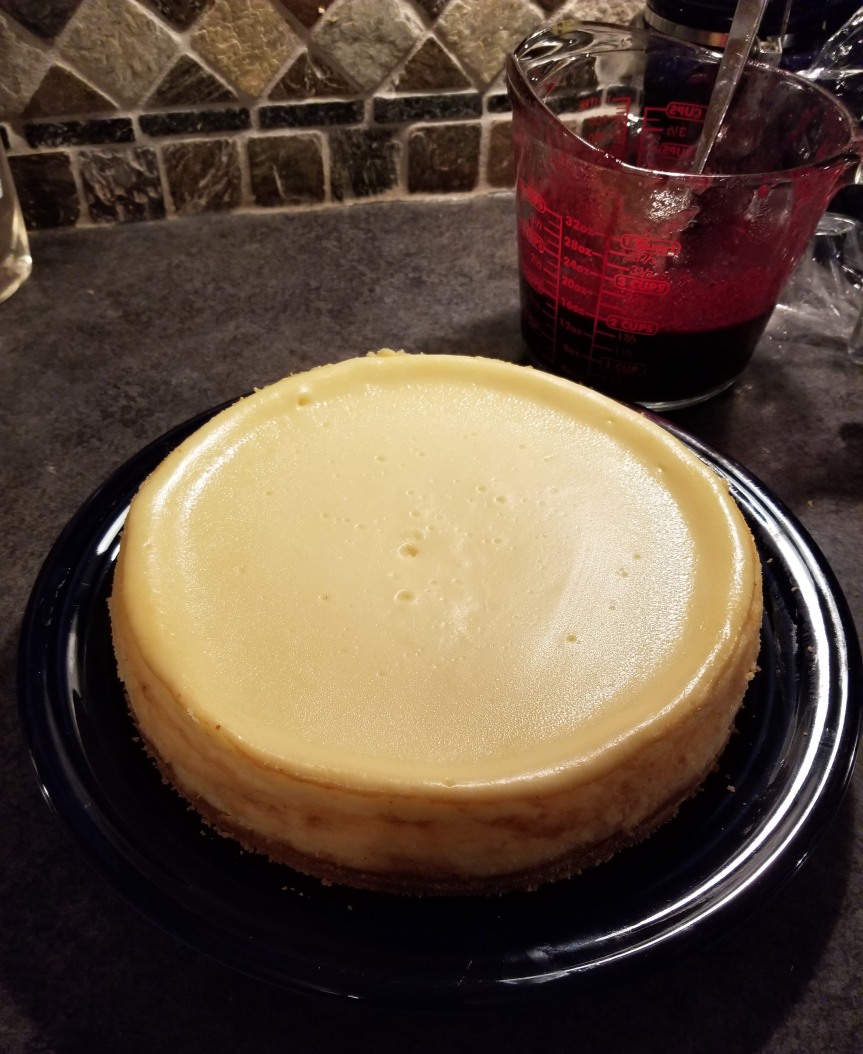
This cheesecake was pretty easy to put together (everything gets made in the food processor!), and because ATK includes weights, I was able to use minimal measuring cups. It took a while to bake and cool, which kept me up later than I would have liked, but the results were well worth it. There were no unsightly cracks in the top of my cheesecake, and it had a rich, creamy texture. We all loved it. In fact, Andy liked it so much that he licked both his plate AND Josiah’s plate clean. The dessert of unity, indeed. 😀

CheesecakewithBBcoulis
Minimal effort went into these pictures. We all just wanted to eat cheesecake. 
JustAddSauceCheesecake
No cracks, and just a few bubbles! It’s a looker for sure. 

Cheesecake with Blueberry Cinnamon Coulis

For the crust: 
6 whole graham crackers, broken into pieces
2 1/3 ounces sugar
2 1/2 ounces AP flour
1/4 teaspoon salt
6 tablespoons unsalted butter, melted

For the cheesecake: 
2 pounds cream cheese
8 3/4 ounces sugar
4 large eggs
1/4 cup heavy cream
1/4 cup sour cream
2 teaspoons vanilla extract

For the coulis:
15 ounces fresh or frozen blueberries (thawed if frozen)
1/4 cup water
5 tablespoons sugar
1/8 teaspoon salt
2 teaspoons lemon juice
1/8 teaspoon ground cinnamon

To make the coulis: 
Combine the berries, water, sugar, and salt in a medium saucepan. Bring the mixture to a gentle simmer over medium heat. Cook, stirring occasionally, until the sugar dissolves and the berries are heated through.

Use an immersion blender to process the mixture until it’s smooth. Place a fine mesh strainer over a medium bowl and strain the blueberry sauce through the strainer, pressing on the solids to extract as much puree as possible. Stir the lemon juice into the strained puree. Taste the mixture and adjust with additional sugar if needed. (I didn’t think mine needed any extra sugar.) Cover and refrigerate until well chilled, at least an hour. Stir to recombine before serving, and if necessary, thin with water before serving. (I also didn’t need to thin mine out.) 


To make the cheesecake: 
Adjust the oven rack to the middle position and preheat the oven to 325°. Grease a 9″ springform pan.

In a food processor, combine the graham cracker pieces and the sugar for the crust. Process until the graham crackers are finely ground, which should take about 30 seconds. Add the flour and the salt, and pulse a few times to combine. Then, add the melted butter to the bowl and pulse until the crumbs are evenly moistened, about 10 pulses.

Spread the crumb mixture in the bottom of the springform pan. Use the bottom of a dry measuring cup, firmly press the crust into the pan. Bake until the crust is fragrant and begins to brown around the edges, about 13 minutes. Remove the crust from the oven and allow it to cool completely. (This will take longer than you expect. Trust me. I put it on the front porch to help speed things up.) Reduce the oven temperature to 250°.

When the crust is almost cool, make the filling. In a clean, dry food processor bowl (yep, you need to wash it between steps), process the cream cheese and the sugar until it is smooth, about 3 minutes. Scrape down the sides of the  bowl as necessary. With the food processor running, add the eggs, one at a time, until they are just incorporated, which should take about another 30 seconds. (I found it helpful to crack the eggs, one at a time, into a small bowl so I could easily transfer them to the food processor while it was running. If I tried cracking them into the food processor, I figured I’d get shells in my cheesecake!) Scrape down the sides of the bowl, then add the cream, sour cream, and vanilla. Process to combine, about 30 seconds.

Pour the cheesecake mixture onto the cooled crust, and then gently tap the pan on the counter to release any air bubbles. Use the tines of a fork to gently pop any bubbles that rise to the surface.

Make sure that your oven is at 250°, and then place the cheesecake on the middle rack. Bake the cheesecake until the edges are set and the center jiggles slightly when shaken. If you have an instant-read thermometer, the internal temperature should register 155°. The bake time will probably be somewhere between 1 hour and 20 minute and 1 1/2 hours.

Transfer the pan to a wire rack and let it cool completely, about two hours. Refrigerate the cheesecake until completely cold, at least six hours. (Mine was in the fridge for about 20 hours.) 

To remove the cheesecake from the springform pan, run a paring knife between the edge  of the cake and the side of the pan. Then, unclamp the ring and remove the sides of the pan. Slide a thin, metal spatula (I used my large offset spatula here) between the crust and the bottom of the pan to loosen it, and then slide the cheesecake onto a serving platter.

Before serving, let the cheesecake stand at room temperature for 30 minutes. Use a warm, dry knife to cleanly slice the cheesecake into wedges. Serve with the coulis. Store leftovers in the refrigerator.

From Just Add Sauce

Click here for a printable version.

What We’re Eating: 4/23 – 4/27

It’s time for a weekly menu! I haven’t done a great job of sticking to a menu lately, so I’m putting this out there so I have a little bit of accountability. 😉

Monday 4/23 – Meatless Monday this week with Zucchini fritters!
Tuesday 4/24 – I’m leaving Andy to fend for himself while I get tacos with some girlfriends. Hopefully there are still leftovers by the time we get to Tuesday night. 😉
Wednesday 4/25 – Skillet Lasagna. This is one of my favorite things from Cook it in Cast Iron. I’m pretty pumped for dinner on Wednesday.
Thursday 4/26 – Brats with TBD sides. I have almost no inspiration right now, so we’ll see what sounds good when Thursday actually rolls around.
Friday 4/27 – Pizza! I think we’ll order out this time. Glass Nickel sounds like a good way to start the weekend.

Simple and Sweet

When it comes to holiday menus, I kind of forget about the drinks. I get so caught up in balancing the classic, “we have to have this because it’s TRADITION”  recipes and the new “this looks intriguing” recipes that I forget about having something to drink besides water. It’s not that I’m not into other beverage options; I just have more fun making food. Plus, it’s usually more fun to eat your calories, rather than drink them. (Fair warning if you come to our house – the beverage choices are probably rather limited.) 

We hosted several friends for Easter again this year, and I spent the week beforehand looking at ham recipes and trying to decide which type of rolls to bake. It wasn’t until Saturday afternoon, when the rolls were rising, that I realized I didn’t have anything to drink besides water. And I wasn’t going out to the grocery store the Saturday before Easter. No thank you.

After a quick survey of the fridge, freezer, and pantry, I decided that strawberry lemonade was the way to go. I still have a fair amount of strawberries in the freezer from last summer, and there were some lemons kicking around in the crisper drawer. Plus, the recipe I found got good reviews and was super easy to put together. Puree, strain, mix, and chill. The perfect amount of prep for a holiday weekend!

The original recipe says to mix the strawberry-lemon mixture with three cups of water, so that’s what I started with. I gave Andy a sample sip, and, well, you should have seen his face. 😀 I added an extra 1 1/2 cups of water, and we thought it was the perfect balance of sweet and tart. (Of course, you may feel differently… adjust to taste!) 

With as easy as this one is, I might start serving drinks more often!

StrawberryLemonade
The best part about this lemonade? It matches my pitcher. 🙂

Strawberry Lemonade 

1/2 pound frozen strawberries, thawed
1 1/2 cups plus 2 tablespoons fresh lemon juice, divided
1 cup sugar
3-5 cups cold water

Place the strawberries in a blender (or a deep bowl, if you’re using an immersion blender) and pour two tablespoons of lemon juice over the berries. Puree the strawberries until they are smooth.

Set a fine mesh strainer over a 4-cup measuring cup and pour the pureed strawberries through the strainer, straining out any seeds. Add the lemon juice to the strained strawberry juice. Add the sugar and stir until the sugar dissolves.

Pour the strawberry-lemon concentrate into a large pitcher. Add 3 cups of water to the concentrate and stir to combine. Taste the lemonade, and if it is too strong, add additional water until lemonade reaches your desired strength. Serve cold.

From Epicurious 

Click here for a printable version.